
This guide walks you through setting up your new CrashPlan for Microsoft 365 environment. By the end of this guide, you will have signed in to the portal, granted the necessary permissions to your Microsoft 365 environment, and configured your first assets to back up.
Prerequisites
You must have an account with CrashPlan for Microsoft 365. If you don't have an account, you can sign up for a Free Trial.
You must have Microsoft 365 Global Administrator access. If your admin account does not have this access, CrashPlan will be unable to fully grant permissions, and backups may not be able to start.
Step 1: Sign in to the CrashPlan for Microsoft 365 portal
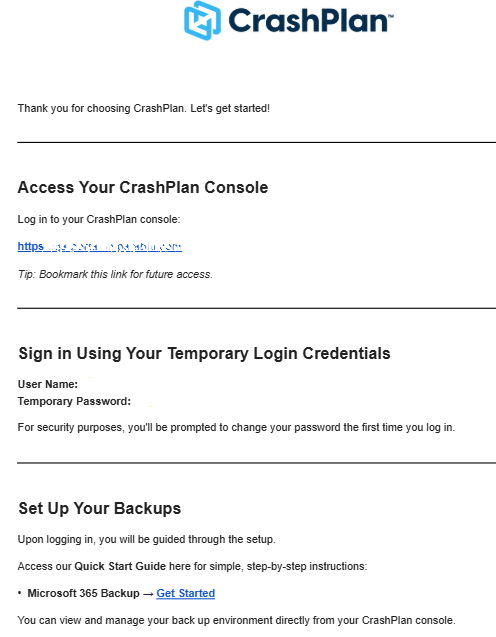
When you sign up, you will receive a welcome email containing a unique portal link, your username, and a temporary password. Click the portal link and use the provided username and password to sign in.
If you have already enabled an existing CrashPlan product, such as Google Workspace or Server Backup, the email will provide only the dedicated URL. You will not receive a login username and password in the email.
Step 2: Change your password
Because your initial password is temporary, the portal will immediately prompt you to create a new, unique password. You will use this new password and your existing username to log in going forward.
Step 3: Provide consent to your Microsoft 365 environment
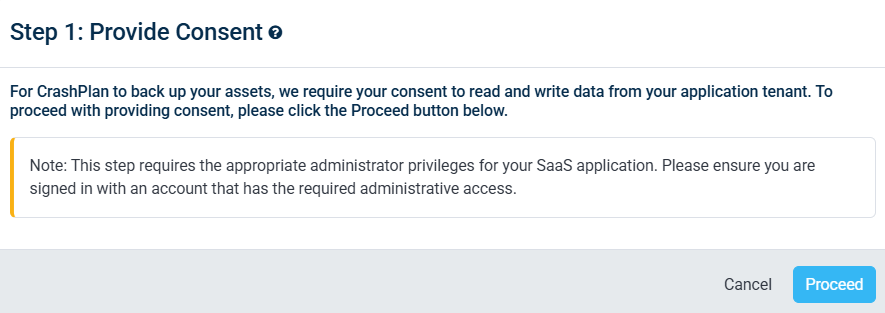
For CrashPlan to successfully back up your assets, it requires certain permissions from Microsoft 365. After signing in, you will see a wizard that will guide you through the process to integrate your Microsoft 365 tenant with CrashPlan.
Click Proceed once you have carefully read the instructions.
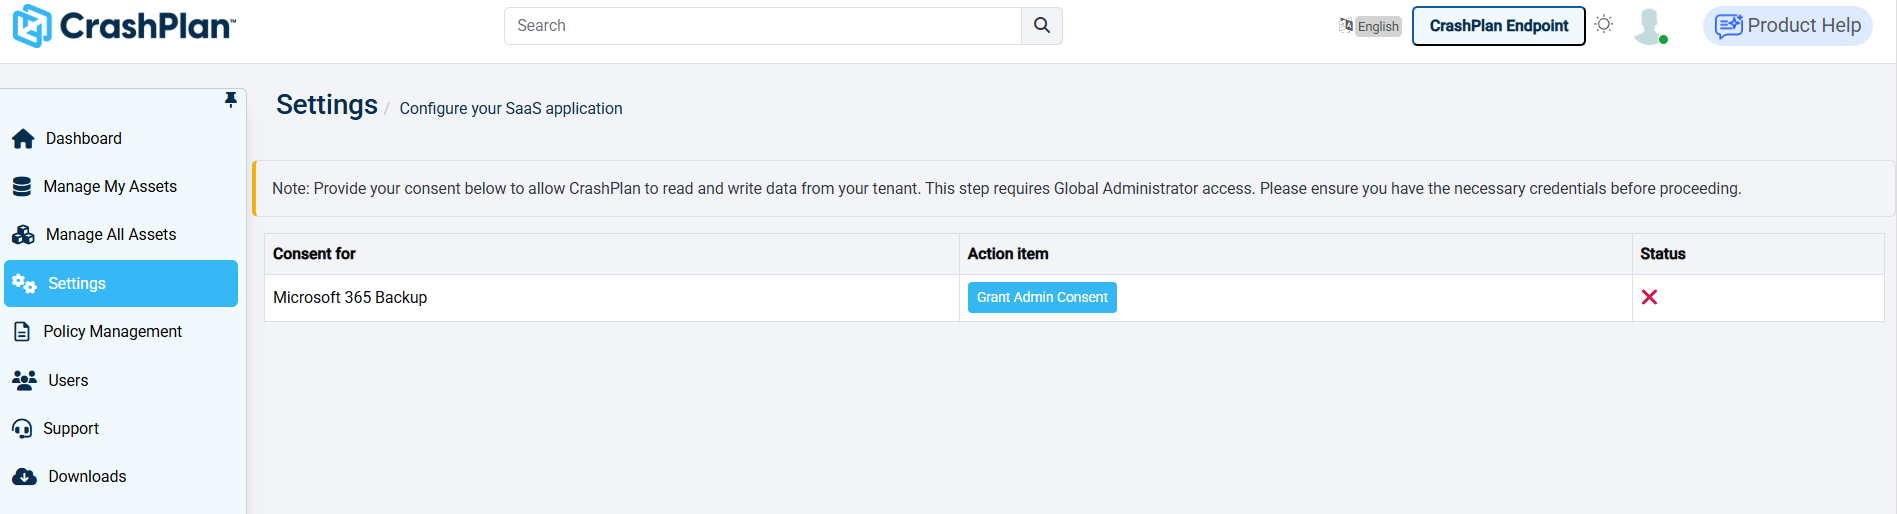
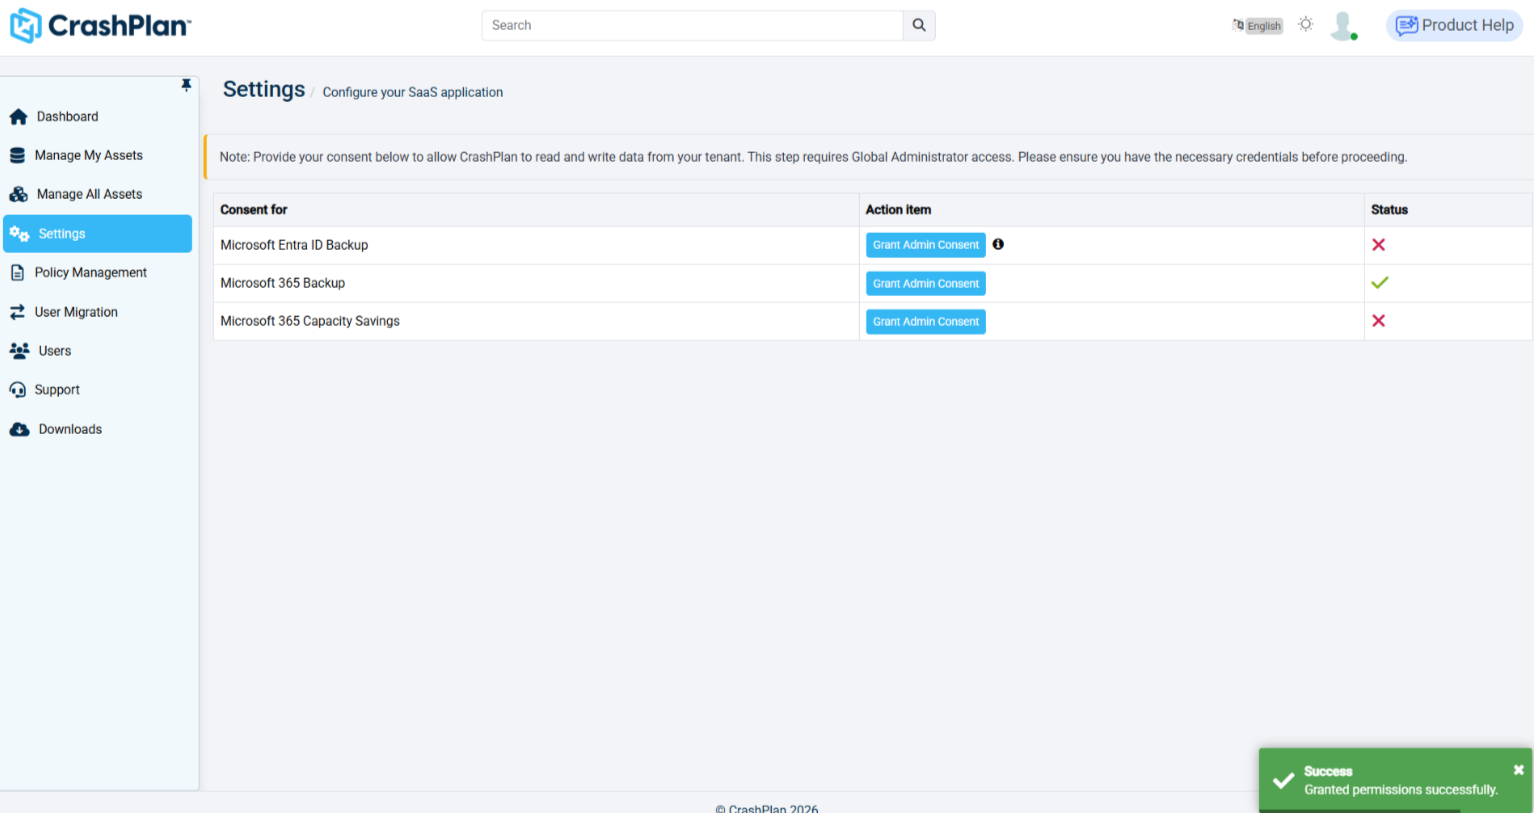
On the Microsoft 365 Consent screen, click Grant Admin Consent.
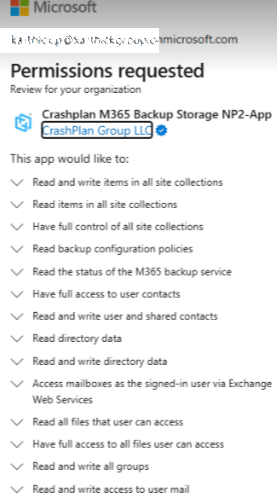
You will be redirected to a Microsoft sign-in page to select your tenant's administrator account.
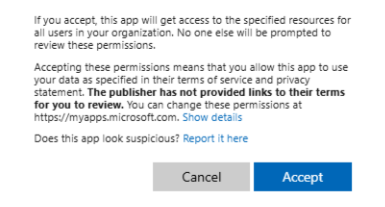
Review the permissions list and click Accept.
Once the action is complete, a green Success pop-up will appear in the bottom-right corner of your screen.
Step 4: Configure assets for backup
An asset is a Microsoft Exchange mailbox, OneDrive for Business user, or SharePoint site you wish to back up using CrashPlan. The wizard will guide you through the process of assigning backup licenses and backup policies to initiate the backups.
Click Proceed to go further.
You can choose to configure the each of the Microsoft 365 asset automatically or manually.
Navigate to the Manage All Assets section on the home page to access:
Microsoft Exchange: Manage All Assets > Microsoft Exchange > Configure Mailboxes
Configure Microsoft Exchange mailboxes automatically
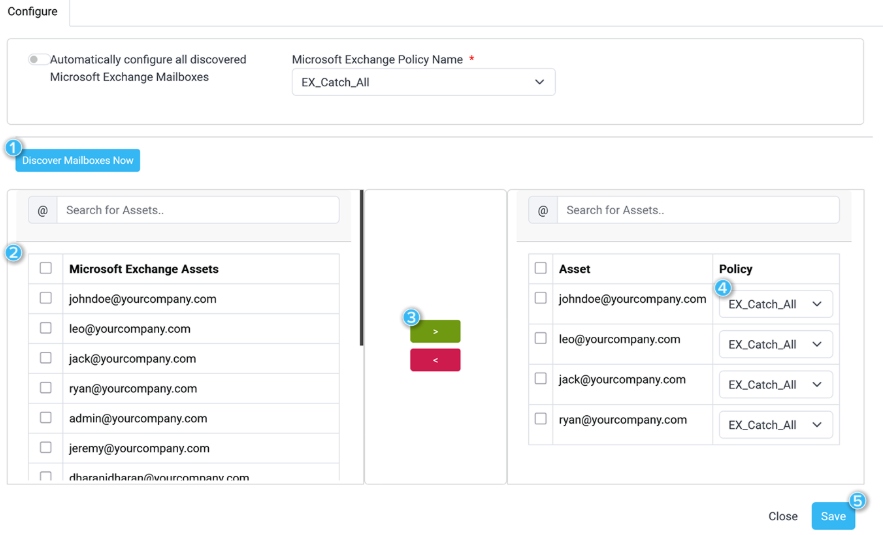
Toggle Automatically configure all discovered Microsoft Exchange Mailboxes.
Select a policy for the discovered mailboxes to use. By default, an EX_Catch_All policy is selected, which we highly suggest using. (If desired, you can create custom policies later in the Policies section).
Click Save to complete.
Configure Microsoft Exchange mailboxes manually
Click Discover Mailboxes Now to populate the asset list on the left.
Check the box next to the user(s) you wish to configure for backup. You can use the search box to narrow down the list or find a specific asset.
Click the green right-pointing arrow to add them to the configuration list. (To remove items from the configuration list, check their boxes and click the red left-pointing arrow).
In the configuration list, select a policy for each item (such as the default EX_Catch_All policy).
Click Save to complete.
Configure OneDrive and SharePoint
You can view and configure OneDrive and SharePoint assets using the same automatic and manual steps described above. You can also use these menus to make changes to your Microsoft 365 assets later.
Navigate to the Manage All Assets section on the home page to access the following paths:
OneDrive for Business: Manage All Assets > OneDrive for Business > Configure OneDrive
SharePoint Online: Manage All Assets > SharePoint Online > Configure Sites
Next steps
Once your assets are configured, your backups will begin automatically.
Microsoft 365- Administrator Guide - Learn more about the product and deep dive into available features.
Contact our technical support team - If you have questions or run into issues.