
This guide walks you through the initial setup of CrashPlan for Microsoft Entra ID, from accessing the CrashPlan portal and granting administrator consent to configuring Microsoft Entra backup and verifying protected objects.
Prerequisites
Before you begin, ensure that:
Your organization has a CrashPlan for Microsoft Entra ID account.
You have access to the dedicated CrashPlan portal for your organization.
You have a Microsoft account with sufficient administrator privileges to grant the permissions requested by CrashPlan.
Step 1: Enable the Microsoft Entra license
Before configuring Microsoft Entra, ensure that the required Microsoft Entra license is enabled for your CrashPlan environment.
Sign in to the CrashPlan Portal using your administrator credentials.
From the left navigation menu, select Support.
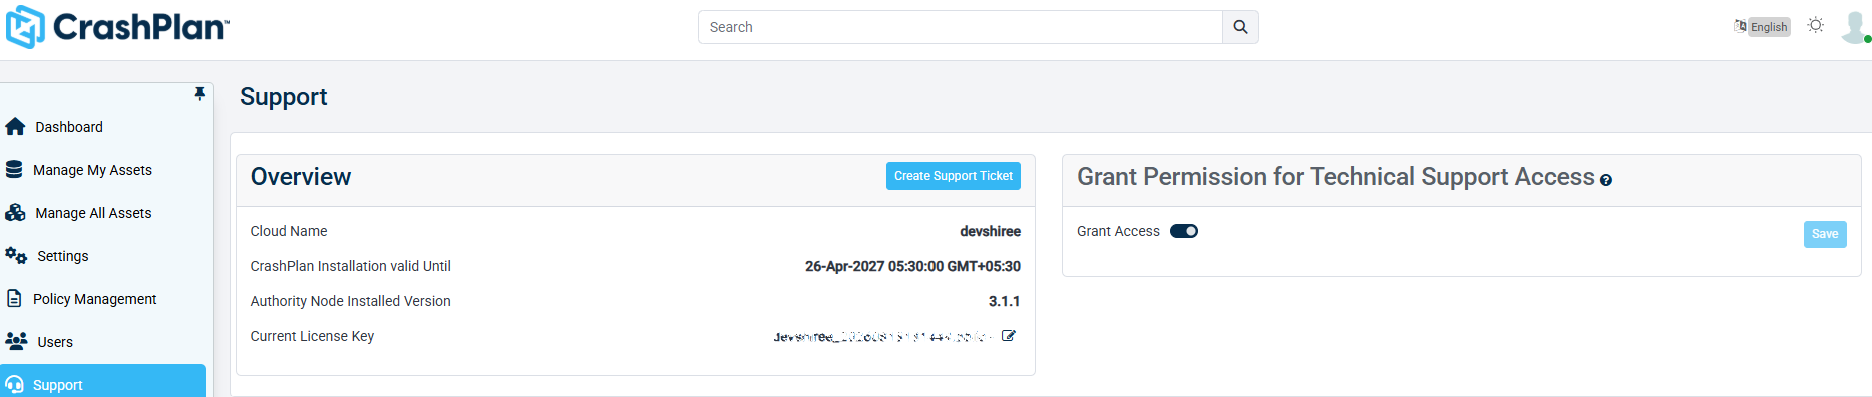
Review the licensing information for your CrashPlan environment.
Obtain the required Microsoft Entra license key through CrashPlan Support/licensing.
Apply the license key to enable Microsoft Entra for your environment.
Verify that the Microsoft Entra license is active.
The Support section is also where the platform exposes license-related information such as the active license key and license validity.
Step 2: Access Microsoft Entra
After licensing is complete:
Sign in to the CrashPlan Portal.
Navigate to the Microsoft Entra ID product.
Start the Microsoft Entra ID onboarding/configuration process.
You must use an account with the required Microsoft administrator privileges to grant CrashPlan access to the Entra tenant.
Step 3: Grant administrator consent
CrashPlan requires permission to access and protect the supported Microsoft Entra objects.
On the Microsoft Entra ID consent page, click Grant Admin Consent.
You are redirected to the Microsoft sign-in page.
Select or sign in with the administrator account for the tenant.

Review the permissions requested by CrashPlan.
Click Accept to grant the required permissions.
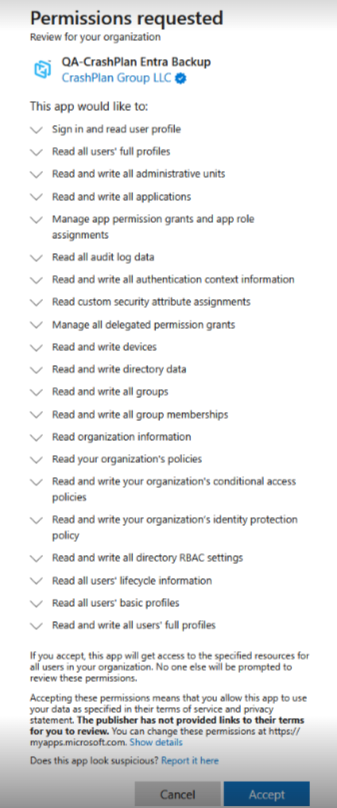
After the consent process completes, return to the CrashPlan Portal.
Verify that the consent status is successful. A green checkmark with the tenant's name is displayed when complete. Once administrative consent is successfully granted, CrashPlan registers the Microsoft Entra ID tenant and prepares it for protection.
Step 4: Add or configure the Entra tenant
After granting consent:
Continue to the tenant configuration.
Select the Microsoft Entra tenant that you want to protect.
Verify the tenant details.
Complete the tenant configuration.
Confirm that the tenant appears in CrashPlan and is available for backup management.
Step 5: Configure the Entra backup policy
Configure the policy that determines how the tenant's Entra data is protected.
From the left navigation menu, select Policy Management.
Open the Microsoft Entra policy configuration.
Create a new policy or use an existing Entra policy.
Configure the required backup and retention settings.
Save the policy.
Step 6: Assign the policy to the tenant
Navigate to Policy Management > Change Tenant Policy.
Search for the required tenant.
Enter a tenant name to locate a specific tenant.
Enter all to display all tenants.
Review the tenant's currently assigned policy in the Policy Name column.
Click Change Policy next to the required tenant.
Select the required Entra policy.
Confirm the policy change.
Step 7: Verify the protected Entra objects
After the tenant and policy are configured:
Navigate to Manage All Assets.
Select the Microsoft Entra tenant.
Review the available Entra object categories, such as:
Administrative Units
App Registrations
Conditional Access Policies
Use Calculate Count, where available, to view the number of protected objects.
Verify that the expected Entra objects are available and being protected.
Step 8: Compare Entra tenant states
After backup data is available, you can compare the tenant's state between different points in time.
From Manage All Assets, open the required Entra tenant.
Click Compare Entra Tenant State.
Under Compare source, select the required date and time.
Choose the comparison target:
Point-In-Time – Compare against another selected backup date and time.
Live Backup – Compare against the current backup state.
If you select Point-In-Time, specify the comparison date and time.
Click Compare.
Review the results to identify changes between the selected Entra tenant states.
Next steps
Once your assets are configured, your backups will begin automatically.
MICROSOFT ENTRA ID ADMINISTRATOR GUIDE - Learn more about the product and deep dive into available features.
Contact our technical support team - If you have questions or run into issues.