
This area shows only the assets assigned for the signed-in user.
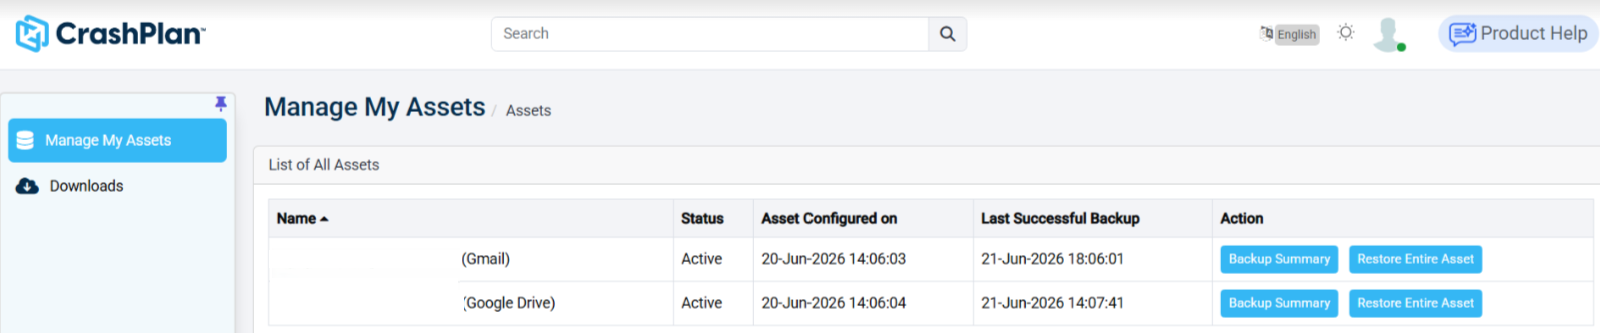
To see a list of all assets in your organization, see the Manage All Assets page. You must be an administrator to view this page.
Name | The name of the listed asset in Exchange, OneDrive, or SharePoint. Clicking the name of the asset will display additional information - see the Manage Assets section for details. |
|---|---|
Status | Displays whether or not the asset is active. |
Asset Configured on | Displays the time and date when the asset was first set up |
Last Successful Backup | Displays the time and date when the asset last completed a backup. |
Action - Backup Summary | Opens a detailed backup summary page for the selected asset, including the following information:
|
Action - Restore Entire Asset | Provides a list of options to restore the entire contents of the asset. See the Manage All Assets section for more information. |
Backup Activity Summary
From the Manage My Assets page, click Backup Summary for the required asset.
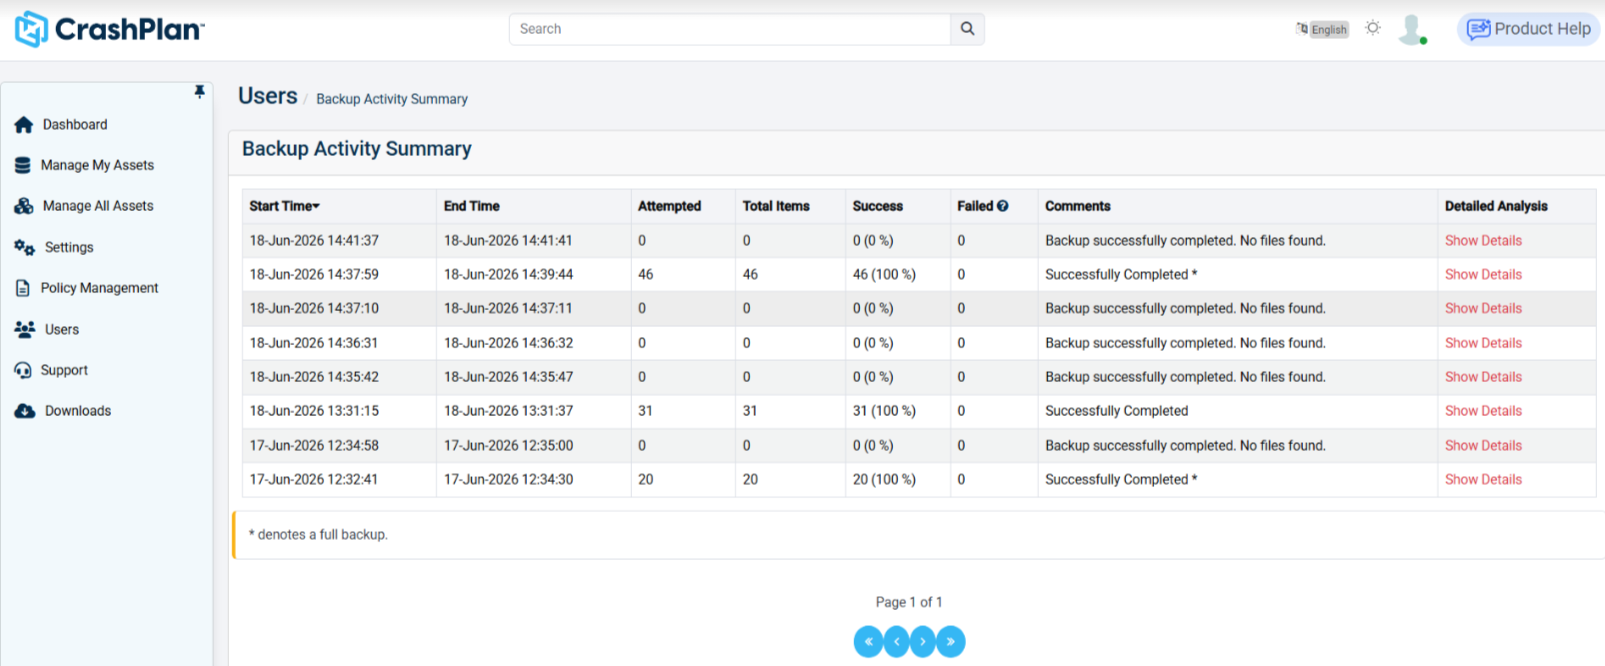
The Backup Activity Summary page opens, displaying the backup history for the selected asset.
Review the Start Time column to identify when each backup job began.
Check the End Time column to verify when the backup job completed.
Review the Attempted column to see the total number of items processed during the backup.
Check the Total Items column to confirm the total number of items identified for backup.
Verify the Success column to determine how many items were successfully backed up and the completion percentage.
Review the Failed column to identify any backup failures.
Check the Comments column for additional job status details, such as successful completion or if no files were found.
Click Show Details under the Detailed Analysis column to view deeper insights into the backup job, including item-level status and errors.
Use the pagination controls at the bottom to navigate through additional backup history records if multiple pages are available.
Regularly review this summary to monitor backup health, verify successful completion, and investigate any failures.
Restore an Asset
From the Manage My Assets page, click Restore Entire Asset for the asset you want to recover.
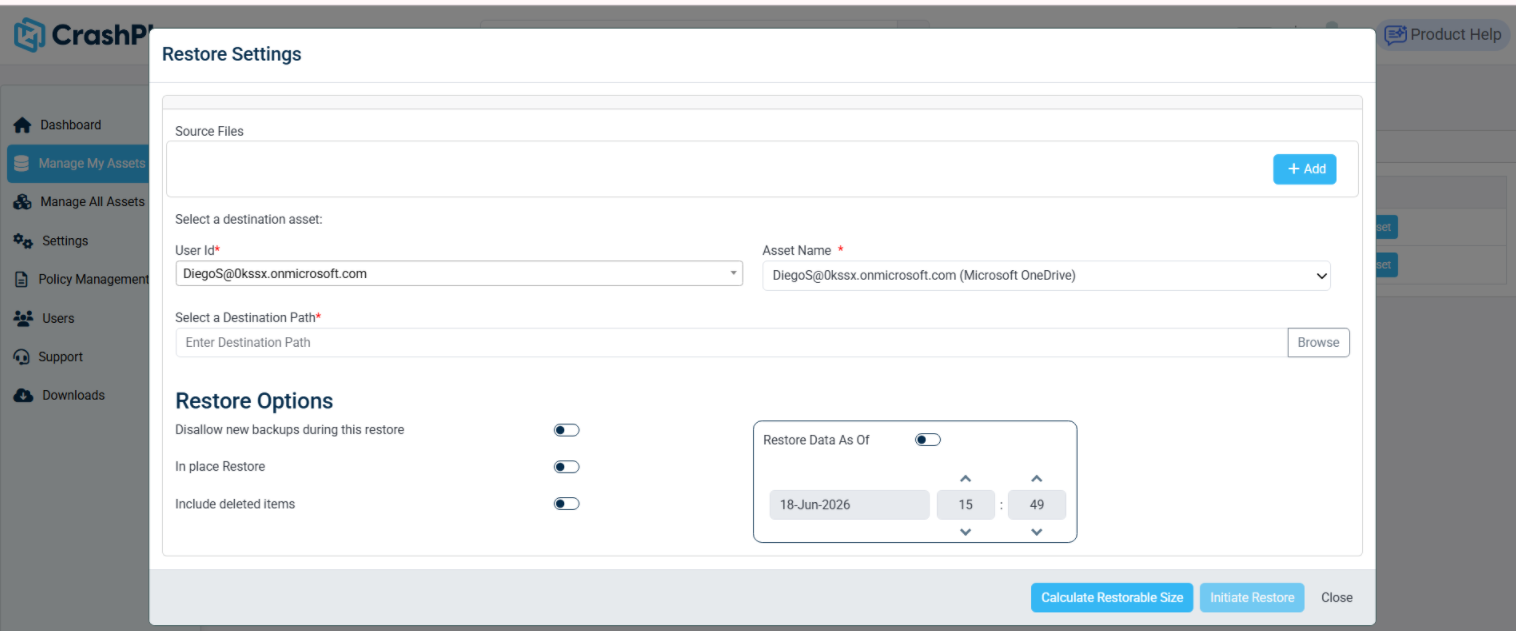
The Restore Settings window opens.
In the Source Files section, click + Add to select the files or folders you want to restore.
Under Select a destination asset, verify the User ID and choose the target Asset Name where the data will be restored.
In the Select a Destination Path field, enter the destination location manually or click Browse to choose the restore path.
Configure the required Restore Options:
Disallow new backups during this restore – Prevents backup jobs from running while the restore is in progress.
In Place Restore – Restores the data to its original location.
Include deleted items – Includes deleted files in the restore operation if available.
Enable Restore Data As Of if you want to restore data from a specific date and time, then select the required restore point.
Click Calculate Restorable Size to estimate the size of the data selected for restoration.
Review all selected settings and confirm the destination path.
Click Initiate Restore to start the restore process.
Monitor the restore progress and verify completion from the restore activity logs or status page.
Asset Details
After clicking the name of a specific asset, you'll be brought to a page that shows the file and folder structure for the asset or site you selected. The name, type, modified date, and size of each file will be shown, and the actions you can take differ slightly depending on what kind of asset or site is selected.
When you right-click on a folder after first left-clicking to select it, you have the following options:
Export as PST Exchange only | Exports the selected folder as a .PST file. |
|---|---|
Download | Downloads the selected folder. This method is not recommended for large file or folder sizes - the Restore method should be used instead. |
Open | Navigates inside the selected folder. To return to the parent folder, use the file path at the top of the page and click on the desired folder. |
Restore | Restores the specified file or folder from the backup. |
Delete | Deletes the specified file or folder from the backup. This option will only appear if enabled by an administrator in Global Settings. |
Viewing Asset Backup Contents and Calculate Folder Size
Use this procedure to browse backed-up asset data and calculate the size of folders/files from the Manage My Assets page.
Log in to the CrashPlan Admin Console.
From the left navigation pane, click Manage My Assets.
Select the required asset from the asset list.
The asset backup contents open in a file explorer view.
Browse through the folder structure.
The current path is displayed at the top (for example, root/).
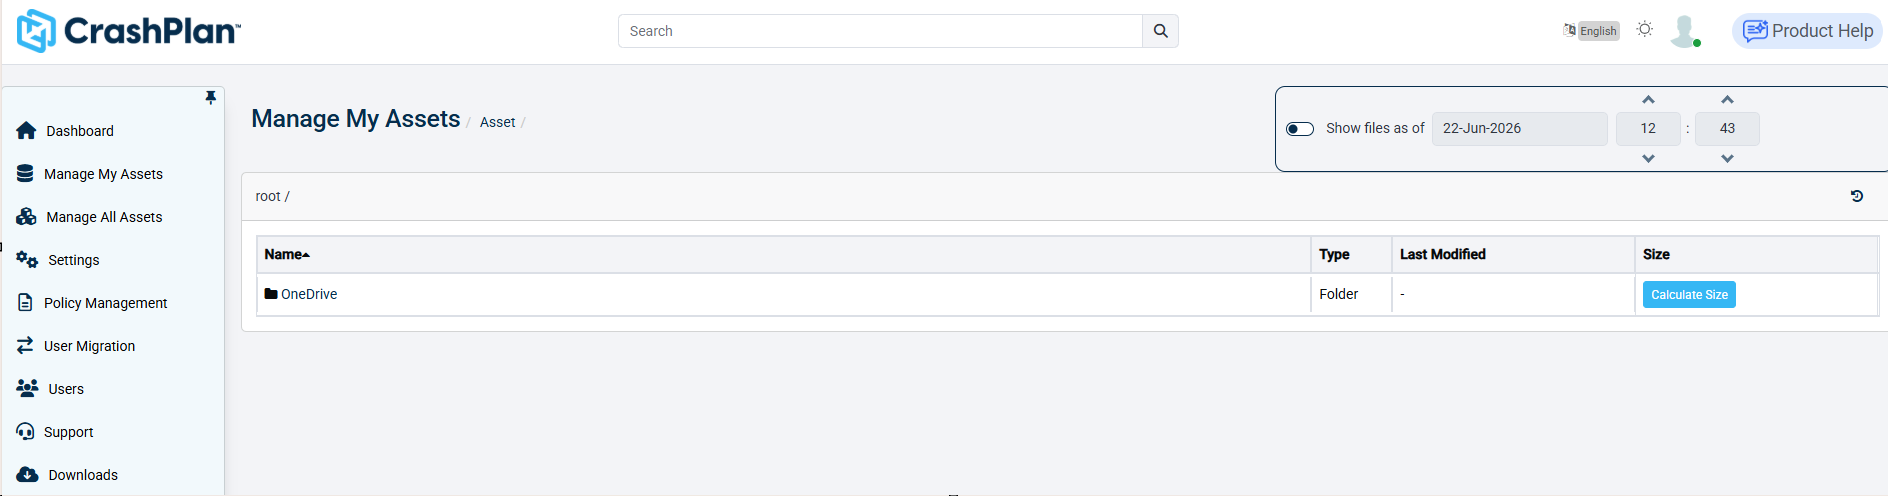
(Optional) Enable the Show files as of toggle to view backup data as it existed at a specific date and time.
Select the required date.
Set the hour and minute values.
To check the size of a folder, locate the folder in the list and click Calculate Size.
Wait for the system to process and display the folder size.
Click on the folder name to drill down further into subfolders and files if required.
Use the Refresh icon to reload the latest asset content view.
You can successfully browse backed-up asset contents and calculate the storage size of specific folders for validation or recovery planning.