Learn step-by-step to enable Capacity Savings for Microsoft OneDrive and SharePoint, including license verification and admin consent setup.
Managing License Entitlement
Capacity Savings is now integrated into license entitlement management and becomes available only when enabled through the tenant’s product license.
Capacity Savings License Entitlement
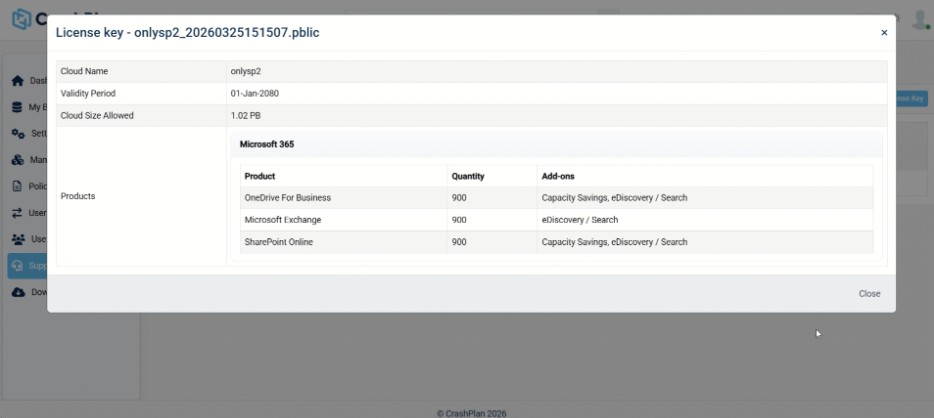
Verify Capacity Savings License Entitlement
- Navigate to: Support → License Key Management
- Select your License Key Name
- Click View
- Locate Capacity Savings add-ons
- Confirm that Capacity Savings is listed as enabled.
RESULT: If enabled, Capacity Savings is available for use. This ensures controlled access to storage optimization features and provides clear visibility into licensed capabilities.
Granting Consent for Capacity Savings
The Capacity Savings permission enables CrashPlan to optimize Microsoft 365 storage by managing backed-up data efficiently.
Steps to Grant Consent
- In the CrashPlan portal, navigate to: Settings → Destination Storage Credentials → Microsoft 365 Configurations
- Locate Consent for Capacity Savings and click Grant Admin Consent
RESULT: A Microsoft sign-in window is displayed. Log in using an administrator account.
- Review the requested permissions carefully and click Accept to grant consent.
- Return to the CrashPlan portal.
- Verify the consent status.
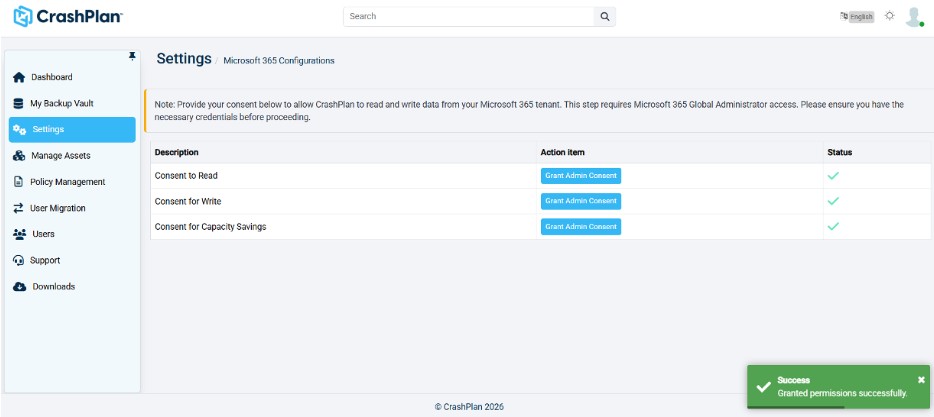
Grant Consent for Capacity Savings
RESULT: A green checkmark appears under Status for Consent for Capacity Savings.