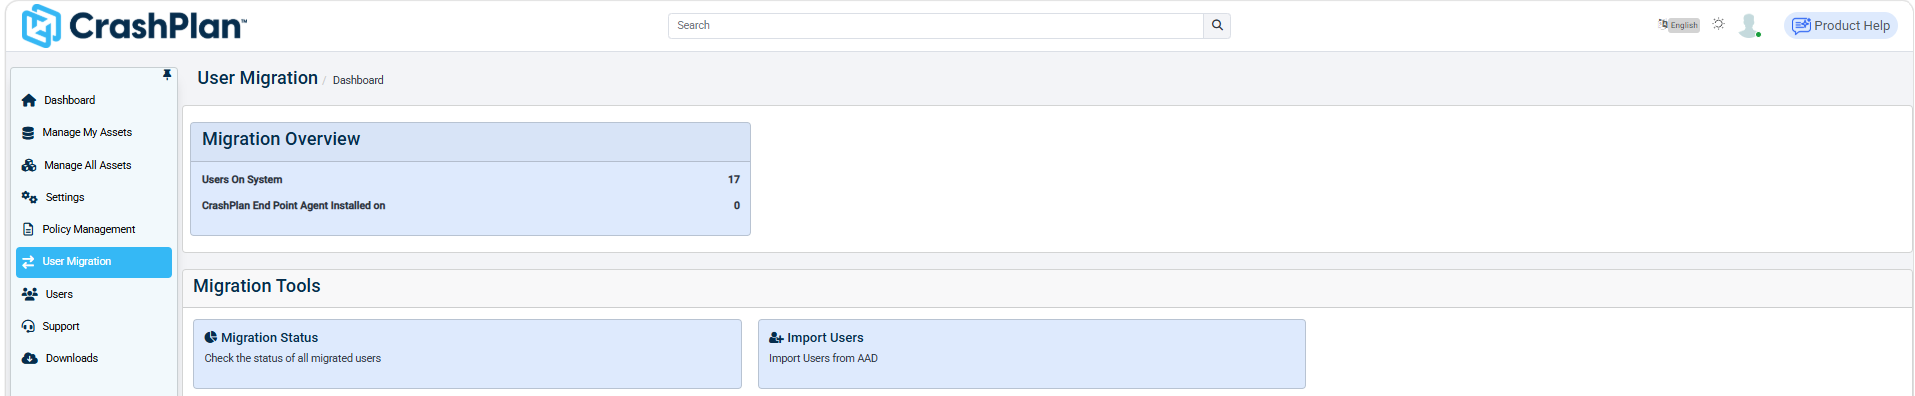
Use the User Migration dashboard to monitor migration readiness, import users, and track migration progress.
Log in to the CrashPlan Admin Console.
From the left navigation pane, click User Migration.
Review the Migration Overview section to view:
Users On System – Total number of users available for migration.
CrashPlan End Point Agent Installed on – Number of users/devices with the CrashPlan endpoint agent installed.
In the Migration Tools section, use the available options:
View Migration Status
To monitor the migration status of users and export migration details for reporting, follow the steps below:
Log in to the CrashPlan Admin Console.
From the left navigation pane, click User Migration.
Select Migration Status.
Review the User Migration Status table.
Verify the migration details for each user, including:
User ID
Email
Migrated Time
Migrated By
Status
Reason (if any failure occurs)
Check the Status column to identify migration outcomes:
Success – Migration completed successfully.
Failed – Migration encountered issues (review the Reason column).
Use the pagination controls at the bottom to navigate through additional user records if available.
To download the migration report, click Export To Excel.
Save the exported file for auditing or troubleshooting purposes.
You can monitor user migration progress, verify completion status, identify failures, and export migration records for reporting.
Importing Users
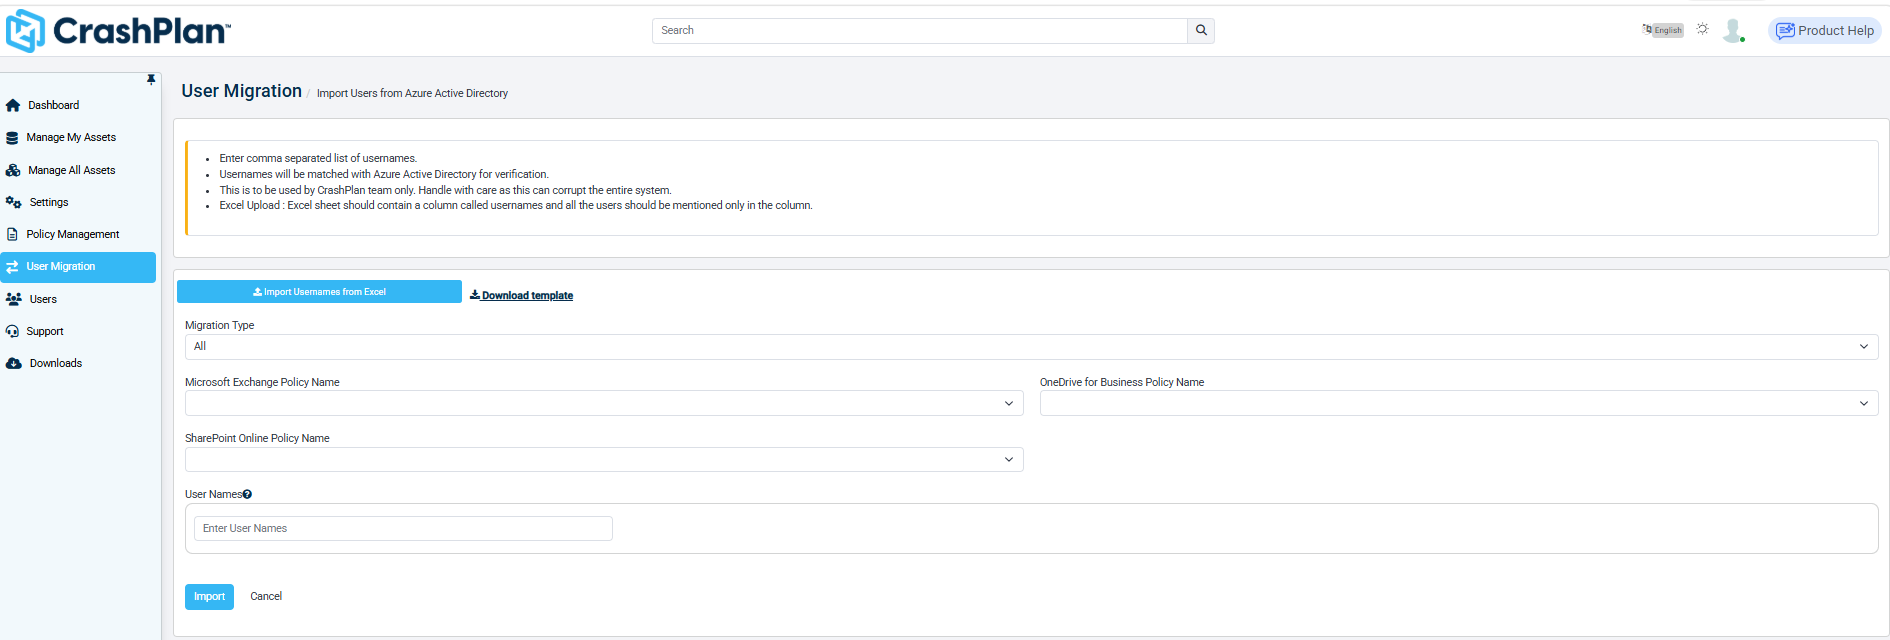
To import users from Azure Active Directory (AAD) into CrashPlan and assign workload-specific backup policies, follow the steps below:
Log in to the CrashPlan Admin Console.
From the left navigation pane, click User Migration.
Select Import Users.
Review the instructions displayed on the page:
Enter a comma-separated list of usernames.
Usernames will be validated against Azure Active Directory.
Use this option carefully, as incorrect entries may impact the environment.
For bulk import, use the Excel template.
To import users in bulk:
Click Import Usernames from Excel.
Download the sample template using Download template.
Populate the template with usernames under the required column.
Upload the completed Excel file.
Under Migration Type, select the workload type:
All
Or specific workloads as applicable.
Select the required backup policies:
Microsoft Exchange Policy Name
OneDrive for Business Policy Name
SharePoint Online Policy Name
In the User Names field, manually enter usernames if not using Excel import.
Separate multiple usernames with commas.
Review the entered details and policy assignments.
Click Import to start the user import process.
Monitor the import and migration status from the Migration Status page.
The selected users are imported from Azure Active Directory into CrashPlan and associated with the specified backup policies for migration.