
The Filters section in Policy Management allows administrators to create, edit, and delete file type filters used in backup policies. These filters help control which file types are included or excluded during backup operations.
Log in to the CrashPlan Administration Portal using administrator credentials.
From the left navigation pane, click Policy Management.
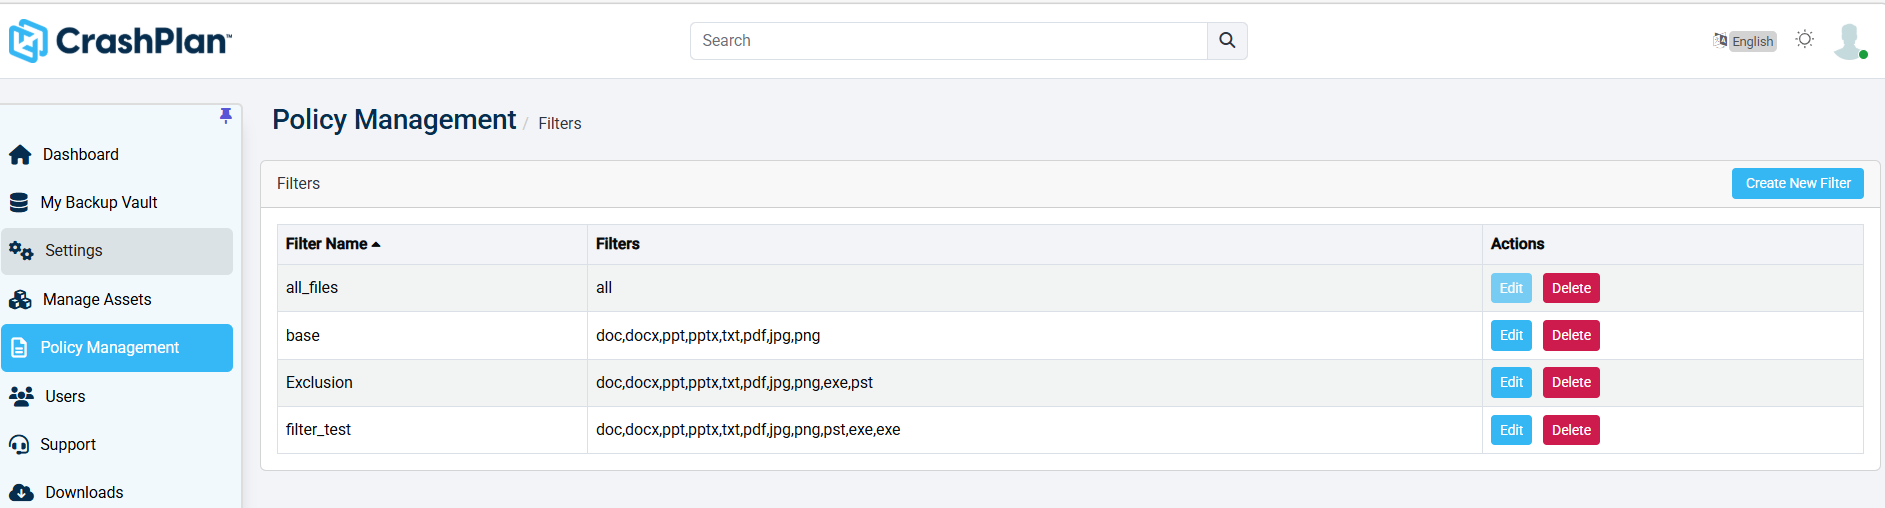
Navigate to the Filters section. The list of configured filters is displayed.
Creating a New Filter
Use this procedure to create a new file filter.
On the Filters screen, click Create New Filter.
Enter the required Filter Name.
Specify the required file extensions or filter values.
Configure the filter settings as required.
Click Save to create the filter.
Editing a Filter
Use this procedure to modify an existing filter.
Locate the required filter from the filter list.
Click Edit under the Actions column.
The following confirmation message is displayed: "If edited in one place across all the policy, it will take effect. Are you sure you want to proceed?"
Click OK.
Update the filter name or file extension values as required.
Click OK to apply the changes.
Deleting a Filter
Use this procedure to permanently remove a filter.
Locate the required filter from the list.
Click Delete under the Actions column.
Confirm the deletion when prompted.
The selected filter is removed from the platform.
Filter List Information
Filter Name | Displays the name of the configured filter. |
|---|---|
Filters | Displays the file extensions or filter rules associated with the filter. |
Actions | Provides options to edit or delete the selected filter. |